How to buy AVAX
There are a few ways to buy the AVAX token in Canada. Each with it’s own tradeoffs:
- You can buy AVAX using a Centralized Exchanges (e.g. Coinbase, Binance, Gate.io etc). In this case, you own the AVAX but you’re not able to interact with the Avalanche network unless you withdraw the tokens to your wallet.
- Bridge your assets from the Ethereum network to the Avalanche network and purchase AVAX with the funds. In this case, you will have to pay gas fees to bridge from Ethereum
However, if you’d like to save on fees and buy AVAX, there is a THIRD way. The best way is to bridge over to the Avalanche network from a low-cost network (e.g. Polygon).
In short, you will be converting Fiat to USDC (Polygon) and then bridging from Polygon over to Avalanche.
Here’s what you’ll need to start interacting with the Avalanche network.
- A wallet solution
- An on-ramp
- A bridge
Wallet
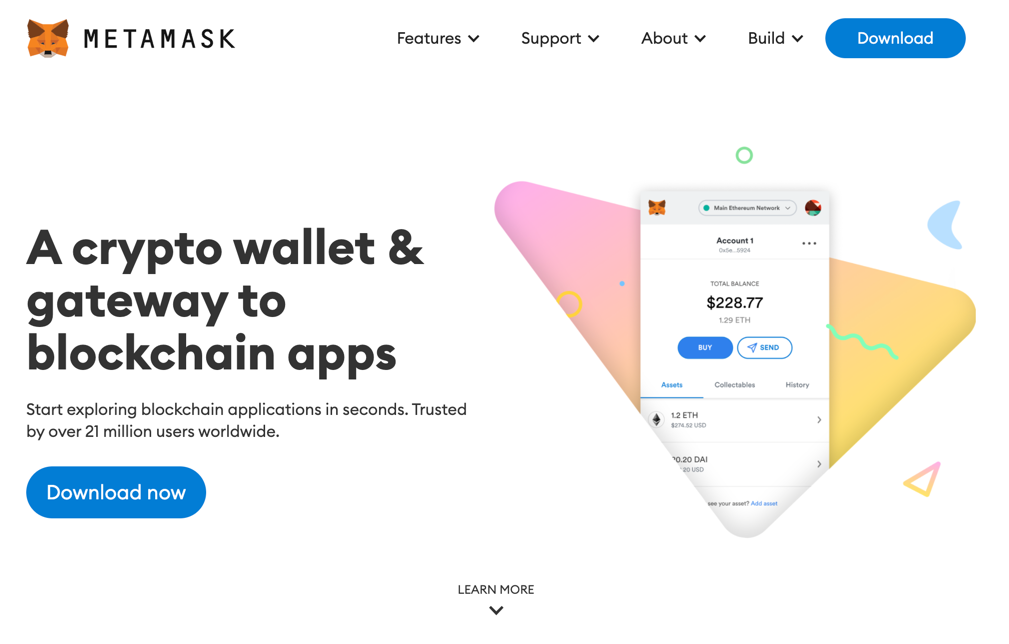
There are many wallet solutions out there. The most popular one is MetaMask. This wallet solution allows you to interact with web3 dapps that are EVM (Ethereum Virtual Machine) compatible.
This is also a full self-custody wallet solution. So remember, never to share your seed phrase with anyone.
Once you have your wallet downloaded, you will need to fund the wallet.
On-Ramp
There are many on-ramp solutions out there. The one that we will go with today is PayTrie.
PayTrie offers a direct on-ramp to convert fiat to stablecoins with a simple and fast eTransfer. You can on-ramp directly onto Polygon, so the gas fees to bridge over to the Avalanche network is minimal.
They charge a flat 0.6% fee with a minimum of $5 per transaction.
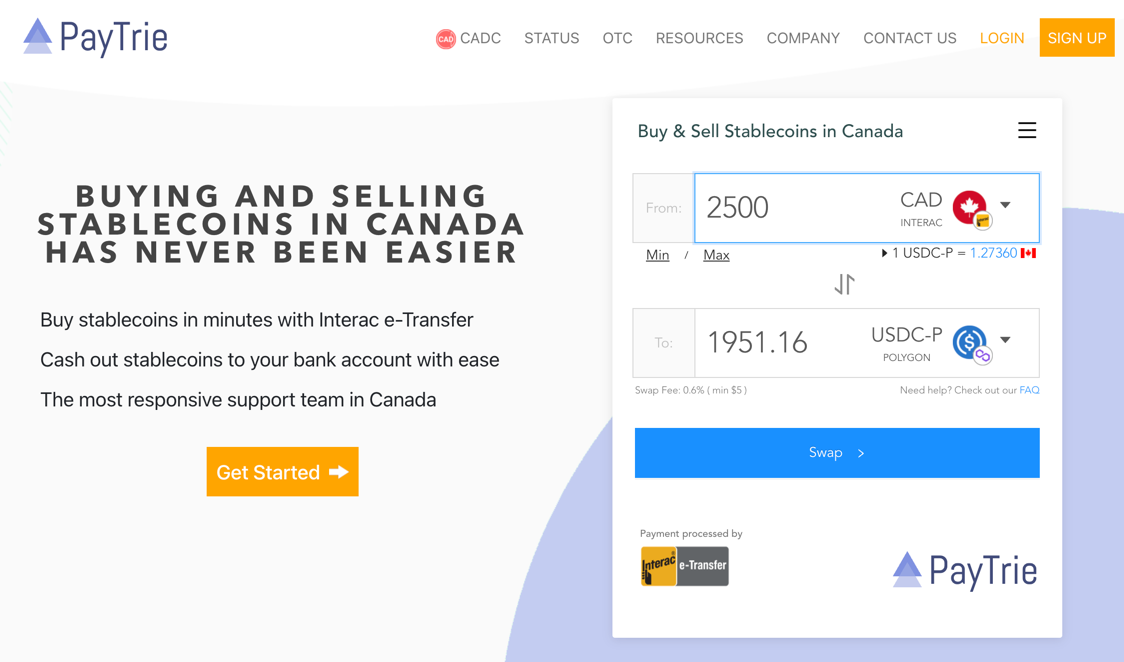
Follow the steps here to buy stablecoins and make sure that you’re sending the USDC on the Polygon network to your MetaMask wallet.
Convert USDC to MATIC
Once the USDC has arrived in your MetaMask wallet, you will need to convert a portion of your USDC to MATIC to pay for gas. Fortunately, gas on the Polygon network is quite cheap, so you would only need 1 MATIC to get started.
Note: If you can’t see the USDC in your MetaMask, it’s possible that you haven’t set up your MetaMask for the Polygon network. Check out the steps here.
Head over to the Polygon Web Wallet: https://wallet.polygon.technology/
Make sure that you are interacting with the correct app. Double check on Google that this is the correct URL.
Once you connect your MetaMask wallet, you will need to head to “swap for gas token”
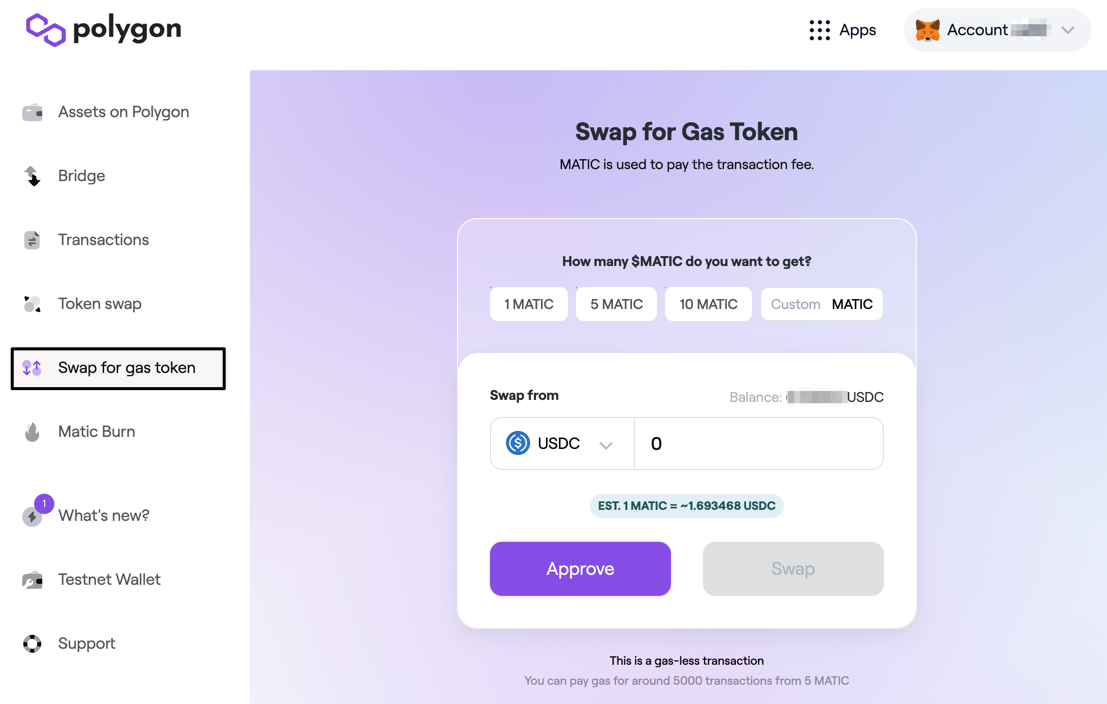
This allows you to swap USDC for MATIC without having to own any MATIC.
Follow the instructions to swap USDC for MATIC.
Now, you should have both MATIC and USDC in your wallet. You can now bridge from Polygon over to the Avalanche network.
Cross-chain Bridge
The bridge we will be using today is the Celer Network Cbridge. This allows us to bridge assets from the Polygon network to the Avalanche network for very low fees.
Make sure to double check that the URL is correct and that it is the official page: https://cbridge.celer.network/#/transfer
Here are the steps to bridge:
- Connect your wallet
- Choose From Polygon >> To Avalanche
- Click Transfer
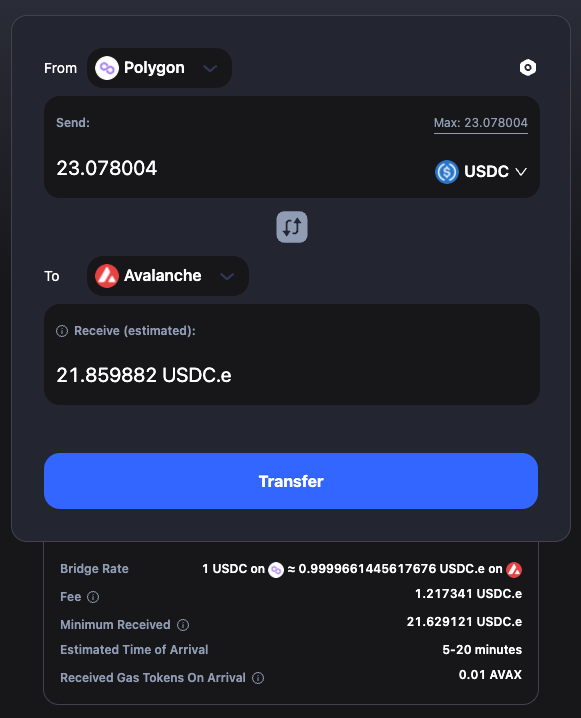
Once the transfer is completed, you will now have USDC.e (on the Avalanche network). You will also receive 0.01 AVAX in your Avalanche wallet to pay for your gas fees.
Note: If you can’t see the USDC.e in your MetaMask, it’s possible that you haven’t set up your MetaMask for the Avalanche network. Check out the steps here.
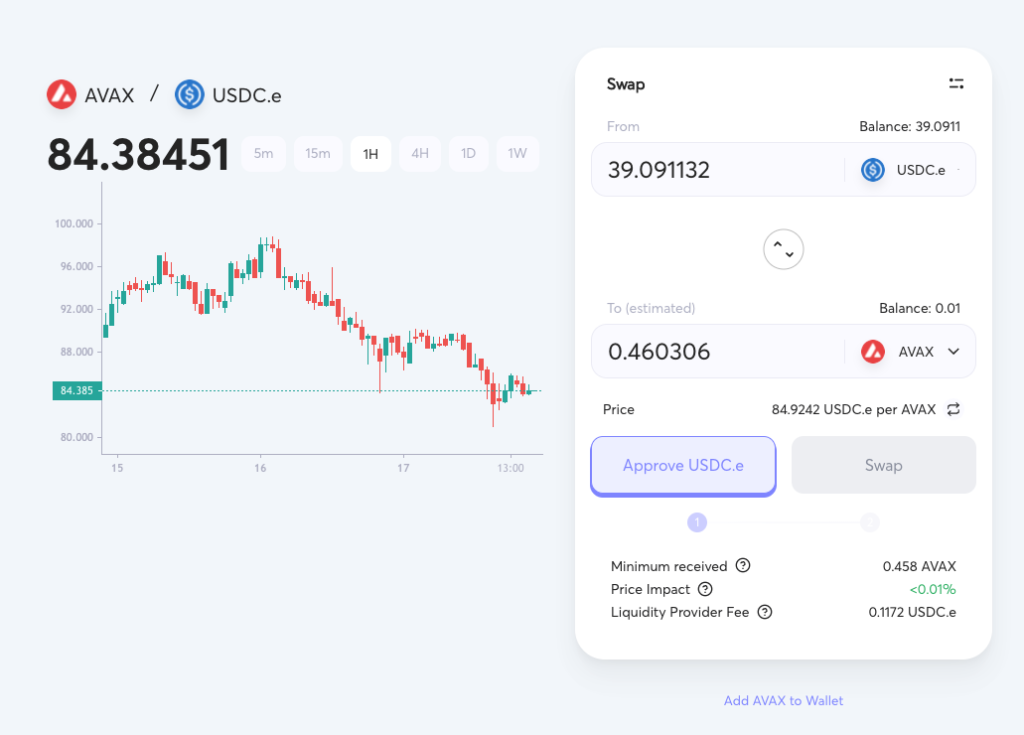
You can now use a Decentralized Exchange like www.traderjoexyz.com to trade your USDC.e for AVAX.
That’s it! Now you can start enjoying the low cost and fast speeds of the Avalanche Network!